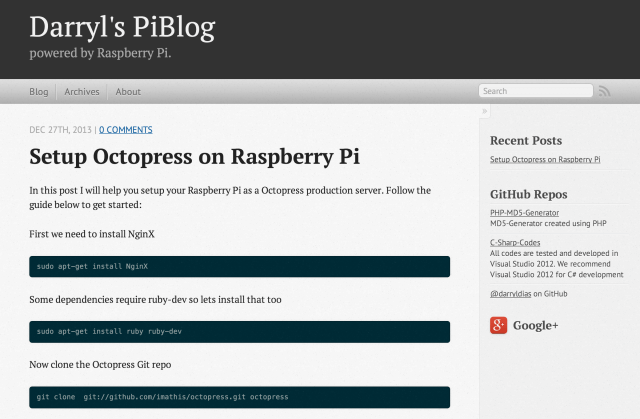
In this article, you’ll be learning how to install the [Octopress Framework](http://octopress.org) on your Raspberry Pi. We’ve tried it for some time now, and it is just plain amazing to work on. A blogging framework for hackers indeed.

What you’ll need
It is better to have all of these handy when getting started.
- Raspberry Pi (obviously).
- Raspbian with SSH enabled. If you haven’t already here’s how it’s done.
- An internet connection; the Raspberry Pi needs to be connected to the internet at all times.
For this setup, we will be using NGINX and Ruby-Dev.
Why NGINX?

NGINX, pronounced as “engine X”, is a lightweight event drive web server. It is very well known for it’s static file handling capabilities.
Let’s get started
1. SSH into the Raspberry Pi
Do this using your favourite piece of software. If you haven’t got one already we recommend Putty for Windows. Macs and most Linux distributions have SSH built in.
2. Install the essential packages
Install Ruby-Dev
We require Ruby-Dev for some dependencies of Octopress. Without Ruby-Dev, Octopress may face some issues during its bundle install process. In your SSH terminal enter the following command.
sudo apt-get install ruby ruby-dev
Install NGINX
Now that we have Ruby and Ruby-Dev installed, we’ll need to install NGINX.
sudo apt-get install nginx-full
Install GIT
GIT is required in order to fetch Octopress from its official GIT repository. Enter the following.
sudo apt-get install git
3. Clone the repository
This will clone the official Octopress repository into your Raspberry Pi’s home directory. You can choose where you wish to clone it. For instance, the following example clones it into the “octopress” folder.
git clone git://github.com/imathis/octopress.git <em>octopress</em>
4. Focus on the folder
Enter the following command, to set your current directory to where you’ve cloned the octopress repository.
cd <em>octopress</em>/
5. Install Octopress’ bundle
Before this happens “bundle” has to be installed. Don’t be intimidated. “Bundle” is a Ruby “gem” required in this process. As for what a “gem” is, it’s simply the equivalent of a package in Ruby.
Install “bundle”
So, to install Bundle we’ll use the following code.
sudo gem install bundle
Install the Octopress bundle
Since we’re focused on the octopress folder, the command simply installs the octopress bundle.
bundle install
6. Set up NGINX
Create the web-root
Create the web root in the folder /var/ named “www”.
sudo mkdir /var/www/
Change directory permissions
Set the permissions of the directory to allow all of read, write and execute to everyone. Here’s how it works.
sudo chmod 777 -R /var/www/
Change the default web directory
Edit the NGINX default configuration file to edit the default web directory.
sudo nano /etc/nginx/site-enabled/default
The NGINX default config should look like the following snippet.
server {
        #listen   80; ## listen for ipv4; this line is default and implied
        #listen   [::]:80 default_server ipv6only=on; ## listen for ipv6

        root /usr/share/nginx/www/; #change this web root
        index index.html index.htm;

        # Make site accessible from http://localhost/
        server_name localhost;
Code language: PHP (php)
Edit the file to look like what follows.
server {
        #listen   80; ## listen for ipv4; this line is default and implied
        #listen   [::]:80 default_server ipv6only=on; ## listen for ipv6

        root /var/www; #this is the new web root
        index index.html index.htm;

        # Make site accessible from http://localhost/
        server_name localhost;```

### 7. Start NGINX

Now that the configuration has been edited, use this command to start NGINX.

`sudo /etc/init.d/nginx start`

### 8. Edit the Rakefile

The Rakefile is in the octopress folder. Its contents should look like this.

Code language: PHP (php)
ssh_user = “user@domain.com“
ssh_port = “22”
document_root = “~/website.com/”
rsync_delete = false
rsync_args = “” # Any extra arguments to pass to rsync
deploy_default = “rsync”
Edit that to look like so.
ssh_user = “pi@you-pi-ipadress” # the pi@and ip-adress of your Raspberry Pi
ssh_port = “22”
document_root = “/var/www/” ## the web root where octopress public will be placed
rsync_delete = false
rsync_args = “” # Any extra arguments to pass to rsync
deploy_default = “rsync” #using rsync to deploy octopress
### 9. Deploy Octopress
Enter the following to deploy Octopress on NGINX.
`bundle exec rake gen_deploy`
And that’s it!!!
Now, you have Octopress blogging framework on your Raspberry Pi. It’s quick and brilliant. Here’s how mine looks.
<figure class="wp-caption aligncenter" id="attachment_2075" style="width: 640px">[](https://revryl.com/2013/12/28/octopress-raspberry-pi/octopress/)<figcaption class="wp-caption-text">Pretty cool framework. I absolutely love its mobile responsiveness.</figcaption></figure>We’re constantly experimenting with the Raspberry Pi. You can actually [pay a visit](http://darrylpi.dlinkddns.com/) to the site and hopefully be able to experience it or whatever we’re doing at the moment. We hope our ISP doesn’t screw with us.
So, tell us about your experiences if you’ve tried Octopress. It certainly is a good Raspberry Pi project if anything.
Code language: HTML, XML (xml)
